Howdy Folks,
Maybe some other update stuff later, but for now – The Wall!
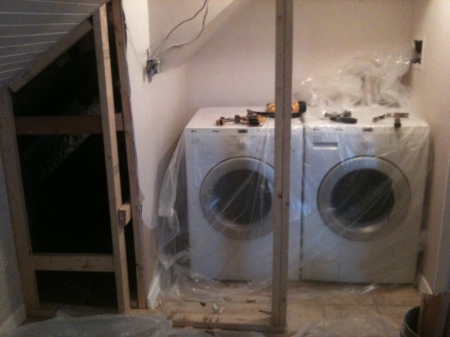
This is a picture of a laundry room in an attic.

You can see the clothes washer through the doorway, but you can’t see the dryer. You can probably imagine that it is difficult to move your wash from one machine to the other with this set-up.
I have more process photos for the full album later, but here is the After (pt 1-2) !


Demo went ultra-smooth. No bad surprises behind the wall. Easy to move the light switch without un/re-wiring it.
Got the drywall off the interior side primarily by hand (!).
The door casing came apart beautifully with no breakage (that’s a first for me).
What i thought was a bead board panel on the walls turned out to be bead board tongue and groove planks, which i also easily removed with minimal damage.
Knocked out all the superfluous studs and blocking.
Tomorrow – frame out the new wall and adapt existing casing and build some new casing. Skin the new wall with the bead board and…
Door fabrication! Instead of building a frame and skinning it, I am going to put the bead planks back-to-back, fit a small frame around the edges for a more finished look, and have the door look like the wall.
Sorry if any of that is confusing. It will fall together for you with the pics, and better narration from a less tired fella.
More soon…
Really fun to see what you are working on. I forwarded the link to Z so he can check it out.
Thanks Karen. I actually thought about Z some while i was planning this beast – and i checked out your reno pics again for any ideas! But i solved one of the problems i was thinking about consulting Z on by thinking through how to ask the question.
I have not taken the time to put these in order yet, but the album is here: https://www.facebook.com/media/set/?set=a.2173568652597.2124487.1048209419&l=cac9cc177c&type=1